Tuesday, January 24, 2023

Needle Felted Raccoon

 Needle Felted Raccoon
Baby Mobile


This little guy looks so much cuter in real life.  Below I have shared the process from start to finish of creating this project.  I skip over wool prep as I have already posted about that last year. Check it out if you haven’t yet. 

So here are my tools and wire that I am starting with to make the core “skeleton” of the raccoon.” It will help give the creature some stability and ability to pose its limbs and tail the way I want.

This shows my work setting with the felting pad, wool and needle ready to go. I have the most wool un-dyed so I like to start with white to form the deeper shape and add color afterwards.

The next step is wrapping a section of wool around the wire form to start giving support and shape to this piece. I do have to be careful with the felting needle as the metal center could break a needle.

I used the barbed felting needle to connect the wool fibers together with repetitive pokes allowing the form to get firmer and take shape.  The more an area is jabbed, the tighter the fibers get, which firms the shape and makes it smaller/tighter.

 Adding small sections of wool to areas that need building up really starts taking on the shape that I was looking for on this raccoon.

Gray wool had been dyed previously and perfect for this project.

Black wool added to the face.  It is starting to look like a raccoon.

Ears have bits of gray and black wool hand carded together to make a dark gray tone.

More gray wool is added to the lower body.

Colors have been added to the tail. And his mouth is felted on.  Will be adding more fluff to the tail, tummy, and cheeks.

White part of the eye is added and the rest of the dark gray bits to the bottom of his foot paws.

He has been fluffed and beads are sewn on to complete the eyes.

He is getting awfully cute.


With some artistic license, this creation came to life from a request for a felted raccoon decoration as a baby gift. I decided it would be a better piece with the raccoon “climbing” a log and used thin wire to sew his paws to each other around the wood and the feet as well.

I had fun picking out the beads to keep the natural colors, while adding a cute hanging ensemble.

I do have a quick video on Pinterest that outlines this process as described in this post, but it does end with the raccoon mobile spinning!  Check it out.


Sunday, January 8, 2023

Feather Fortress


Feather Fortress

In the Making


 You might remember two summers ago when we moved our first chicken coop across the yard and planted it beside our second coop. If you didn’t get a chance to read it. Here is the link: The Adventures of Moving a Chicken Coop


Just below, is a close up of our first coop in its original location.


This is how the coops looked right after the big move, but we had a vision… well mostly Justin had the vision and I trusted that it would look right in the end. 


The coop in the back is actually a combination of our second coop and a home-built chicken tractor that we found difficult to move around the yard and gave it a permanent home attached to this second coop.  The progress has been slow on this rather big project, but it is really coming together and had some great functionality.


Once the first coop was made, leveled and the second coop was squared to it.  We used the roof from our temporary turkey shed to make the new roof on the chicken run.  You can see in these photos that this has just been lifted up and supported… I promise it gets better.


So this step was done in July of 2021 and I’ve kept you waiting this long because I wanted to show you the full look.  And we’re actually not all the way there yet, but we’re getting really close and ready to share the update.


This is a view from the back with the permanent posts in place. None of the siding or frame work has been painted yet. Keep scrolling.


The layout is going to have a ground base of gravel.  A front wall with hardware cloth (much smaller squares than chicken wire and better at keeping out pests) and a short back wall the same with netting for a roof at the back part of their run.


This is the big picture look at this stage. You can also visualize where this feathered fortress is in comparison to the rest of our backyard farm.  The barn is up the drive on the right and the duck house is in the background.


So here it is this fall, with walls up, the posts and sides painted, and the netting closing off the back.  This years’s duck pen was also in need of renovation so they moved into the back coop and shared the outdoor space with our chickens for a while.


We layered the ground with the hardware cloth and then the gravel to protect the birds from digging predators.  We hung their grain and waterers.  The back half-wall also is complete with hardwire cloth.  It is barely visible, but keeps them inside and safe.


Justin built this step and landing to make chores and cleaning one “step” easier.  This is the one side of the buildings that didn’t get a full makeover. But we do have plans to finish the framework below the door and black cedar shakes beside the window. This front section has easy access to the nesting boxes.


The new indoor step ladder for hens leads into our first coop.  We have named it Chick University as it is where we plan to keep the younger , more productive hens with the easier to access nesting boxes as seen in the photo just before this one.  Our second coop is old country hen house.  It’s where we move the older hens to that might not lay as often.


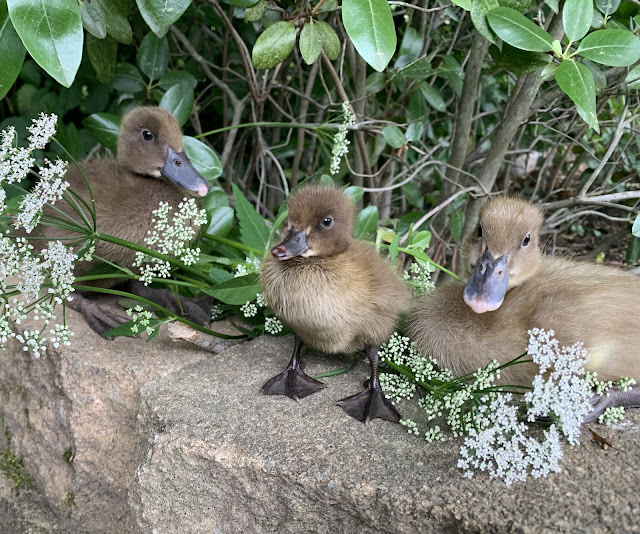
These Khaki Campbell ducks are the offspring of our two female Khakis: Puddles and Caesar.  Caesar was killed protecting her eggs this past spring. We know her ducklings by the white neck marking that made her special.  Her sister Puddles and their friend Inky the hen dutifully sat the 28 days on those eggs until 12 little ducklings hatched out.  Here is my favorite below.


We made a nice big print of this photograph and it came out great.


You can picture the floor to roof space a little more in this photo.  The male ducks from this group and our Appleyard male ducks have all been processed by “Fleece, Feather, and Swine”, another local backyard farmer who we have enjoyed working with.


The back left corner is now a partial storage shed.  We keep the barrels of feed and the off season buckets and tools. It gives the outdoor run a strong corner post.  It is not quite complete. The back and side walls are up and painted, but the edge walls of the front are not. 


 I’ve also been on the lookout for black metal pieces that will make pretty addition to the black framed red walled buildings making up this fortress.  We’ve finished the functional parts of this project, but next Spring we plan to finish the aesthetic look.


  Our goal was to make an all-season chicken run that had a roof to protect them from rain and snow.  Looks like a success! 

We also plan on completing an enclosure to include a duck pond and will post about it this coming Spring/Summer. Our four ewes are pregnant and we’ll be posting our lambing pictures in February/March.
  Come again soon.